Web2Py’s SQLFORM.grid is a very powerful plugin for managing complex CRUD operations. It provides several operations like create, update, delete, search, sort and browser records. It also gives pagination for large records. It is well explained here.
Export functionality
- The export is one of the most useful functionalities of the SQLFORM.grid.
- You can easily export your data in various format like CSV, JSON etc.
- The SQLFORM.grid supports following format:
I’ll explain some useful hacks in this export functionality. Create a app called sample_app using appadmin or PyDAL’s shell. Let’s create two tables in database first.
db.define_table('company',
                Field('name', 'string', notnull=True),
                Field('address', 'text'),
                Field('abbreviation', 'string', length=3),
                format="%(name)s")

db.define_table('employee',
                Field('name', 'string', length=50, notnull=True),
                Field('email', 'string', notnull=True),
                Field('company', db.company),
format="%(name)s")-
You’ll have to add some entries for company and employee tables using appadmin or PyDAL shell.
-
You can use the add functionality of the grid to add some entries. Let’s call the SQLFORM.grid in controllers/index.py
@auth.requires_login()
def index():
    """
    example action using the internationalization operator T and flash
    rendered by views/default/index.html or views/generic.html

    if you need a simple wiki simply replace the two lines below with:
    return auth.wiki()
    """
    query = (db.employee.id > 0)
    # pass query to SQLFORM.grid
    grid = SQLFORM.grid(query, showbuttontext=False)
return dict(grid=grid)- We’ll have to modify the code in views/default/index.html
 {{extend 'layout.html'}}
{{=grid}}- Now check the index page.
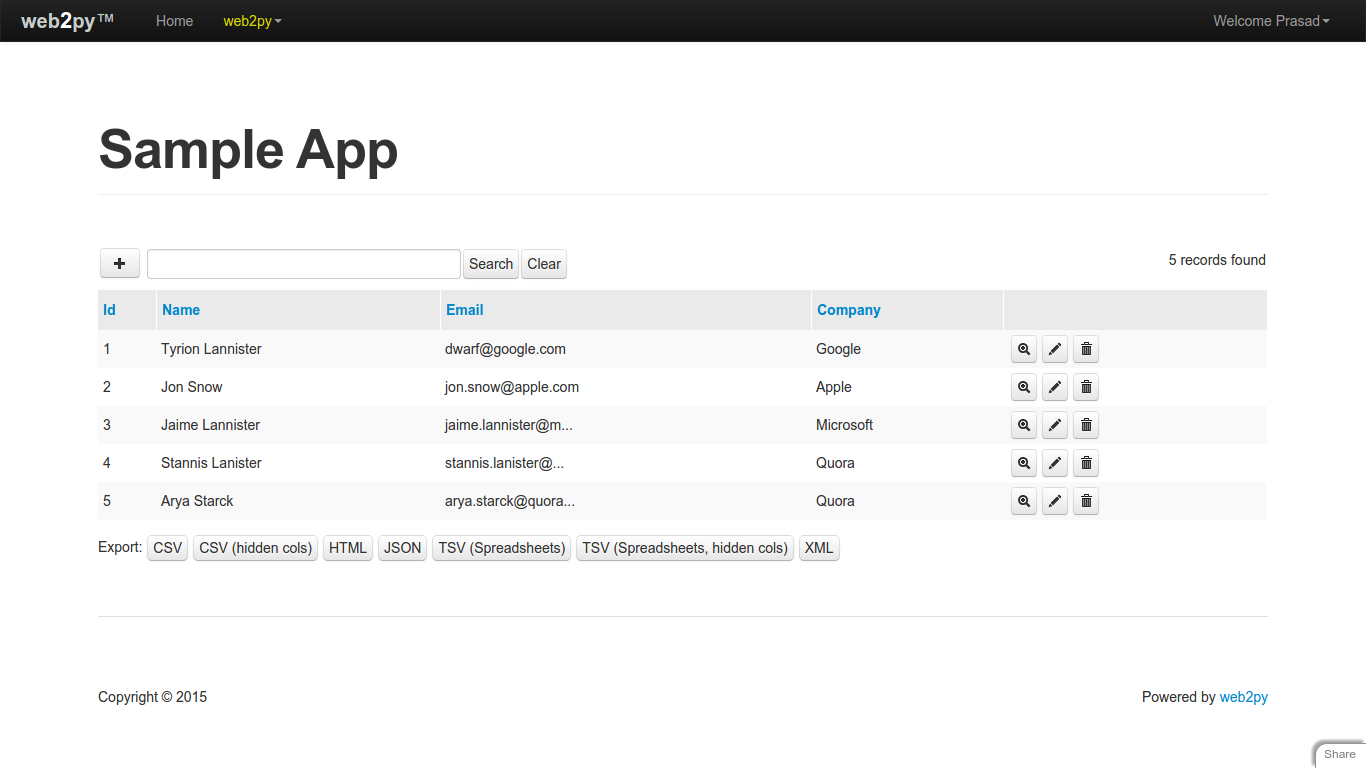
url: http://127.0.0.1:8000/sample_app/default/indexScreenshot of Index page.

- It shows various export type like CSV, JSON, HTML etc. But what if user wants to see only CSV format.
Export Classes
- All formats are displayed by default But we can decide whether to display all formats or single format like CSV.
- The exportclasses parameter decides which format of export will display or not.
- modify your code in controllers/default.py
@auth.requires_login()
def index():
    """
    example action using the internationalization operator T and flash
    rendered by views/default/index.html or views/generic.html

    if you need a simple wiki simply replace the two lines below with:
    return auth.wiki()
    """
    query = (db.employee.id > 0)
    # show only CSV and disable other formats.
    export_classes = dict(csv=True, json=False, html=False,
                          tsv=False, xml=False, csv_with_hidden_cols=False,
                          tsv_with_hidden_cols=False)
    grid = SQLFORM.grid(query, showbuttontext=False,
                        exportclasses=export_classes)
    return dict(grid=grid)
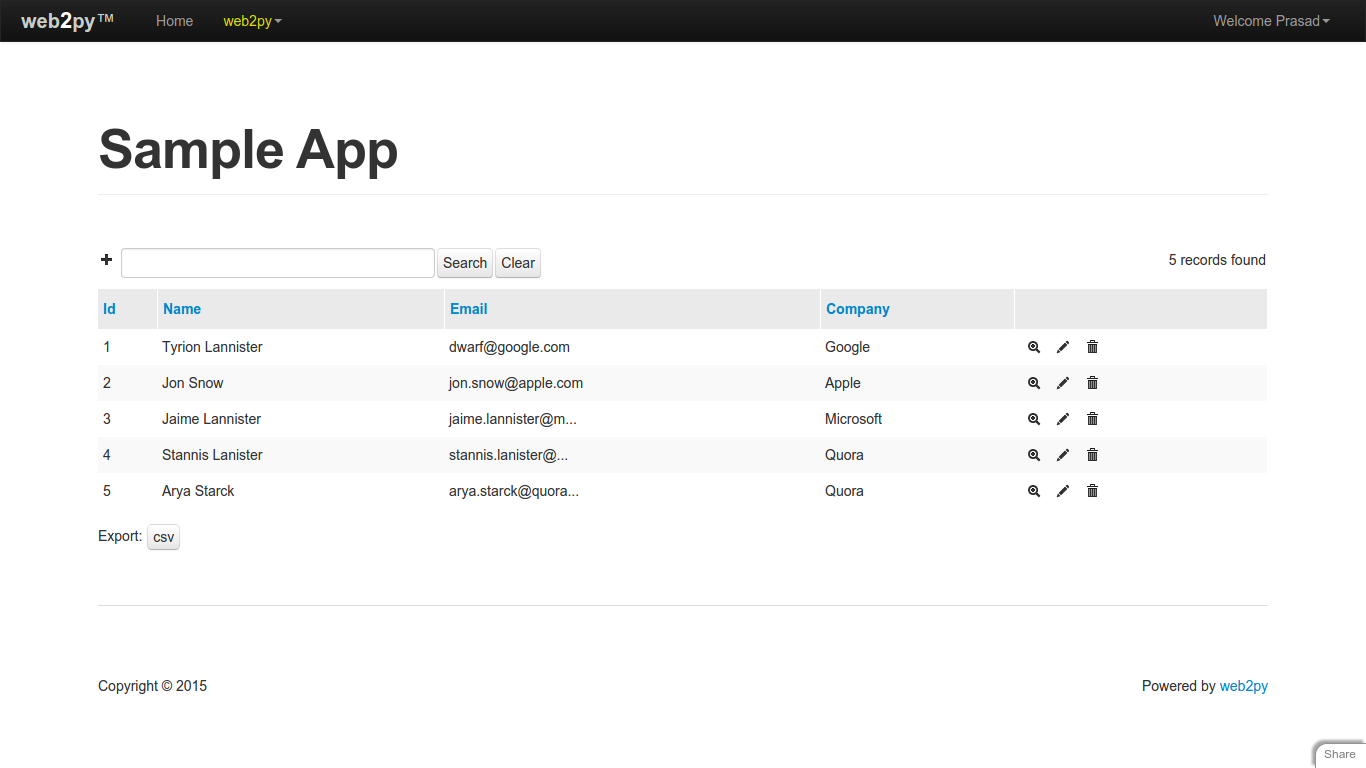
It shows only CSV format and doesn’t show other formats.

- Position of CSV button at the bottm of grid looks odd for user. What if user wants CSV button after search button.
Repositioning the export button
- We can reposition the export buttons for all grids or specific grid.
- If you use following javascript code in views/layout.html then the changes will apply on all grids.
- If you want to apply the changes to employee grid then add the following javascript code in respective view file. In this case, we’ll have to modify views/default/index.html
<script type="text/javascript">
 $(document).ready(function() {
 // if export class exist then append it inside search form
   if($('.w2p_export_menu').length > 0) {
     var export_link = $('.w2p_export_menu a').clone();
	 //rename button to Export to CSV
	 export_link.text('Export to CSV');
	 $(export_link).appendTo('.web2py_console form')
     // remove web2py_export_menu
     $('.w2p_export_menu').remove();
 }
 });
</script>
Save layout.html and refresh the index.html page.

-
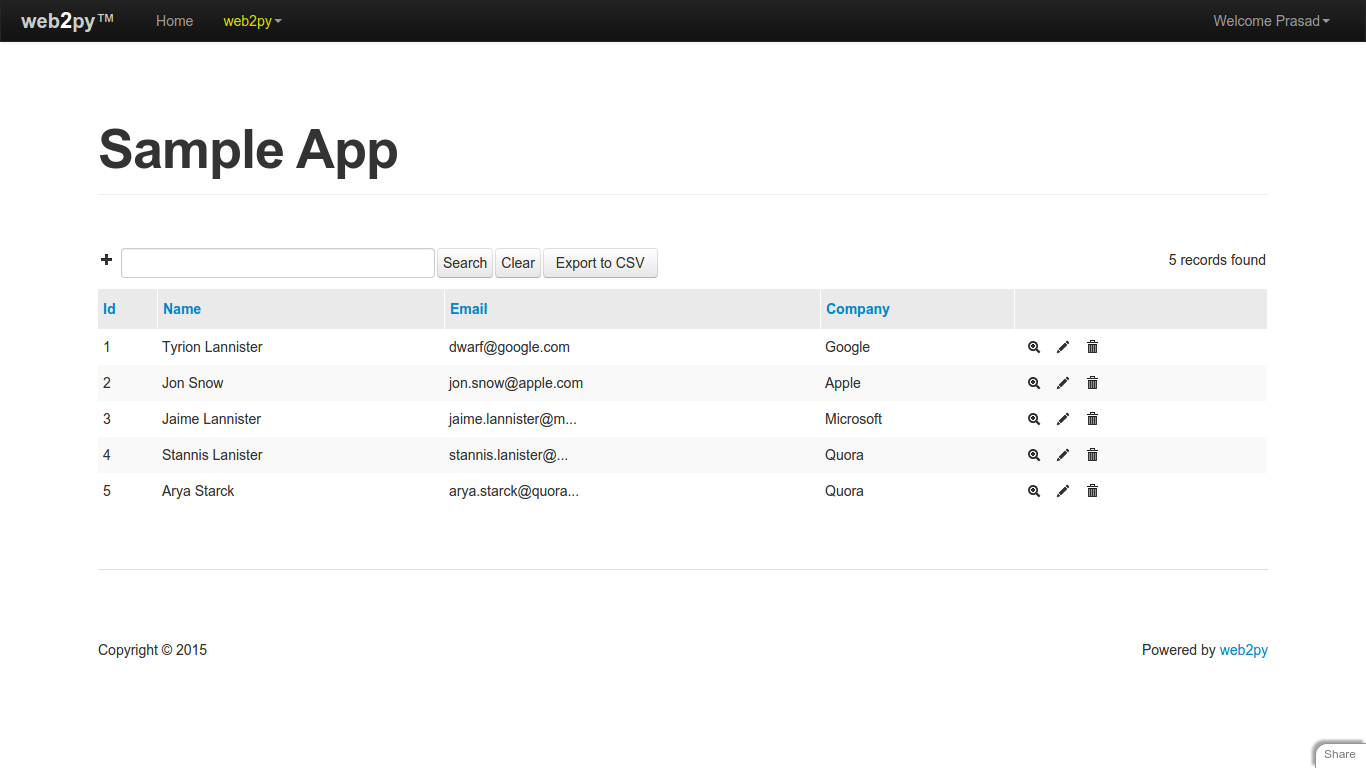
Here, Web2Py adds all export links inside w2p_export_menu class. We’re cloning this class and appending cloned class to web2py_console form class.
-
Let’s check whether export to csv works or not. (Click on CSV button)
| employee.id | employee.name | employee.email | employee.company |
|---|---|---|---|
| 1 | Tyrion Lannister | dwarf@google.com | 1 |
| 2 | Jon Snow | jon.snow@apple.com | 3 |
| 3 | Jaime Lannister | jaime.lannister@microsoft.com | 2 |
| 4 | Stannis Lanister | stannis.lanister@quora.com | 4 |
| 5 | Arya Starck | arya.starck@quora.com | 4 |
-
Here,
It shows company id not a company name in employee.company Because company is a foreign key in employee table.
So How can we display company name instead of ID ?
Display name instead of id in export
- We’ll have to write a custom export class for CSV which will write name instead of id.
from cStringIO import StringIO


class CSVExporter(object):
    """This class is used when grid's table contains foreign key () id of other table)
       Exported CSV should contain reference key name not id"""
    file_ext = "csv"
    content_type = "text/csv"

    def __init__(self, rows):
        self.rows = rows

    def export(self):
        if self.rows:
            s = StringIO()
            self.rows.export_to_csv_file(s, represent=True)
            return s.getvalue()
        else:
return ''- Let’s call this class in export_classes. (Modify code in controllers/index.py)
# show only CSV and disable other formats.
# call custom CSVExporter class.
export_classes = dict(csv=(CSVExporter, 'CSV'), json=False, html=False,
                      tsv=False, xml=False, csv_with_hidden_cols=False,
tsv_with_hidden_cols=False)- Click on Export to CSV button and check whether csv contains company names or ids.
| employee.id | employee.name | employee.email | employee.company |
|---|---|---|---|
| 1 | Tyrion Lannister | dwarf@google.com | |
| 2 | Jon Snow | jon.snow@apple.com | Apple |
| 3 | Jaime Lannister | jaime.lannister@microsoft.com | Microsoft |
| 4 | Stannis Lanister | stannis.lanister@quora.com | Quora |
| 5 | Arya Starck | arya.starck@quora.com | Quora |
- Now It shows company names Becasue of the custom CSVEXporter class.
- The exported CSV file’s headers show employee.id, employee.name etc. The headers format looks unmatched.
- It would be better if the headers are displayed as attribute name like ID, NAME, EMAIL etc.
Changing header names
- Actually It gives you headers as “table_name.attribute_name”.
- For e.g: employee.id
- The gluon.dal.Rows’s colnames gives you the current table’s columns names in a list. So we can obtain the all columns of current name.
- Let’s check it in Web2Py’s shell.
$ python web2py.py -S sample_app -M
web2py Web Framework
Created by Massimo Di Pierro, Copyright 2007-2015
Version 2.9.5-stable+timestamp.2014.03.16.02.35.39
Database drivers available: SQLite(sqlite2), SQLite(sqlite3), MySQL(pymysql), MySQL(MySQLdb), MySQL(mysqlconnector), PostgreSQL(psycopg2), PostgreSQL(pg8000), MSSQL(pyodbc), DB2(pyodbc), Teradata(pyodbc), Ingres(pyodbc), MongoDB(pymongo), IMAP(imaplib)
Python 2.7.6 (default, Mar 22 2014, 22:59:56)
Type "copyright", "credits" or "license" for more information.

IPython 1.2.1 -- An enhanced Interactive Python.
?         -> Introduction and overview of IPython's features.
%quickref -> Quick reference.
help      -> Python's own help system.
object?   -> Details about 'object', use 'object??' for extra details.

In [1]: # get company records

In [2]: rows = db(db.company.id > 0).select()

In [3]: rows.colnames # obtaining colnames of company
Out[3]: ['company.id', 'company.name', 'company.address', 'company.abbreviation']- It returns a list which contains column names. It follows “table_name.attribute_name” format.
- We’ll have to remove the “table_name.” So we get only attribute name.
- Let’s use this logic in the custom CSVExporter class.
from cStringIO import StringIO
import csv


class CSVExporter(object):
    """This class is used when grid's table contains reference key id.
       Exported CSV should contain reference key name of reference
       key not ids"""
    file_ext = "csv"
    content_type = "text/csv"

    def __init__(self, rows):
        self.rows = rows

    def export(self):
        db = current.db
        if self.rows:
            s = StringIO()
            csv_writer = csv.writer(s)
            # obtain column names of current table
            col = self.rows.colnames
            # col contains list of column names
            # e.g: ["employee.id", "employee.name",
            #       "employee.email", "employee.company"]
            # get only attribute names i.e id, name, email, company
            heading = [c.split('.')[-1].upper() for c in col]
            # Write explicitly the heading in CSV
            csv_writer.writerow(heading)
            # don't write default colnames
            self.rows.export_to_csv_file(
                s, represent=True, write_colnames=False)
            return s.getvalue()
        else:
return ''- Let’s click on Export to CSV button and check whether it gives only attribute names or table_name.attribute_name
| ID | NAME | COMPANY | |
|---|---|---|---|
| 1 | Tyrion Lannister | dwarf@google.com | |
| 2 | Jon Snow | jon.snow@apple.com | Apple |
| 3 | Jaime Lannister | jaime.lannister@microsoft.com | Microsoft |
| 4 | Stannis Lanister | stannis.lanister@quora.com | Quora |
| 5 | Arya Starck | arya.starck@quora.com | Quora |
- It shows only attribute names in headers. We can change header name using this trick.
Skipping columns while exporting.
- We can skip columns while exporting the data.
- For e.g: we can show COMPANY column in grid But we can skip it while exporting it.
- Web2Py includes _export_type in request.vars When you click on any export button
- We’ll have to the fields parameter of SQLFORM.grid which decides whether to skip columns or not.
- Le’t modify code in controllers/default.py
@auth.requires_login()
def index():
    """
    example action using the internationalization operator T and flash
    rendered by views/default/index.html or views/generic.html

    if you need a simple wiki simply replace the two lines below with:
    return auth.wiki()
    """
    query = (db.employee.id > 0)
    """ show only CSV and disable other formats.
        call custom CSVExporter class.
    """
    export_classes = dict(csv=(CSVExporter, 'CSV'), json=False, html=False,
                          tsv=False, xml=False, csv_with_hidden_cols=False,
                          tsv_with_hidden_cols=False)
    # skip COMPANY column if request.vars._export_type exist
    if request.vars._export_type:
        fields = [db.employee.id, db.employee.name, db.employee.email]
    else:
        # show company columns in grid
        fields = [db.employee.id, db.employee.name, db.employee.email,
                  db.employee.company]
    grid = SQLFORM.grid(query, fields=fields, showbuttontext=False,
                        exportclasses=export_classes)
    return dict(grid=grid)
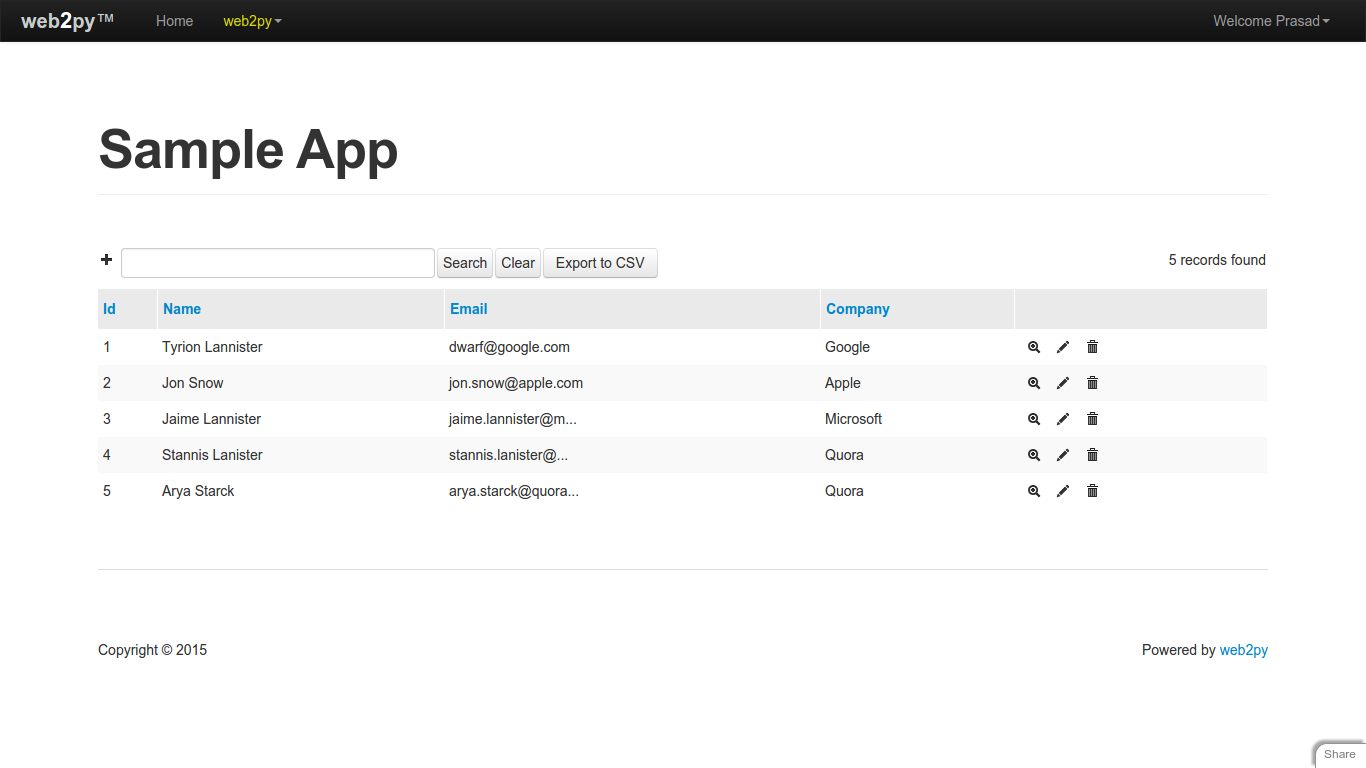
The SQLFORM.grid shows all column names.

- Let’s Click on Export to CSV and check whether company column is skipped or not.
| ID | NAME | |
|---|---|---|
| 1 | Tyrion Lannister | dwarf@google.com |
| 2 | Jon Snow | jon.snow@apple.com |
| 3 | Jaime Lannister | jaime.lannister@microsoft.com |
| 4 | Stannis Lanister | stannis.lanister@quora.com |
| 5 | Arya Starck | arya.starck@quora.com |
- It skipped company column in exported csv file. So we can skip any column using the fields parameter.
Summery
- In this blog post, We’ve learned following things:
- How to use the export functionality.
- Show specified format using exportclasses
- Repositioning the export button.
- Display name instead of ids.
- Changing the header names.
- Skipping columns while exporting the data.
I’ve used web2py’s 2.9 version in above post. The sample app is available here. Report bug if you find any.
